The Hunter Houses Complete Guide to DIY Plaster
As soon as we decided on this plaster project and I started researching how to actually do it I knew I would need to create a basic how-to guide because for some reason all the steps and specific requirements really intimidated me. I’m so glad we found American Clay (not sponsored, just love them) to supply our plaster. When I called to order, still having no idea how I was going to do it, the President of the company spent 20 minutes on the phone with me very patiently walking through everything I would need and even tips on exactly how to do it.
A couple of weeks later when I realized in a panic we wouldn’t be able to plaster straight onto the wood frame we had created for our bookcase, he again walked me through everything in a series of emails.
American Clay has so many great resources on their website including workshop videos and PDF guides for just about everything you can imagine to do with plaster. Below is my quick guide to plastering and what I personally learned along the way!

PREP
The Substrate
Preparing your substrate (the surface you will plaster) is a very important step. Depending on the material, there are different ways to prep for your plaster to make sure it adheres properly and does not delaminate, aka fall off the wall. (I had actual nightmares about this very thing happening).

The most common surfaces you could potentially want to plaster are probably wallboard (drywall, cement board), an already painted wall, wallpaper, and wood. For the last two surfaces, just go ahead and save yourself the time and headache and cover it in wallboard. For a painted surface, you have to check the paint adhesion, especially if you have a few layers of paint on the walls. It is suggested to use a utility knife to make a few superficial cuts and apply masking tape perpendicular to these cuts to see if the paint stays on the wall or peels off with the tape. If it peels off you’ll need to do some additional prep.


There is an entire document on substrate preparation but I’d say the general idea for your substrate is that it should be clean, dust free, and non-porous.
Patch and Prep
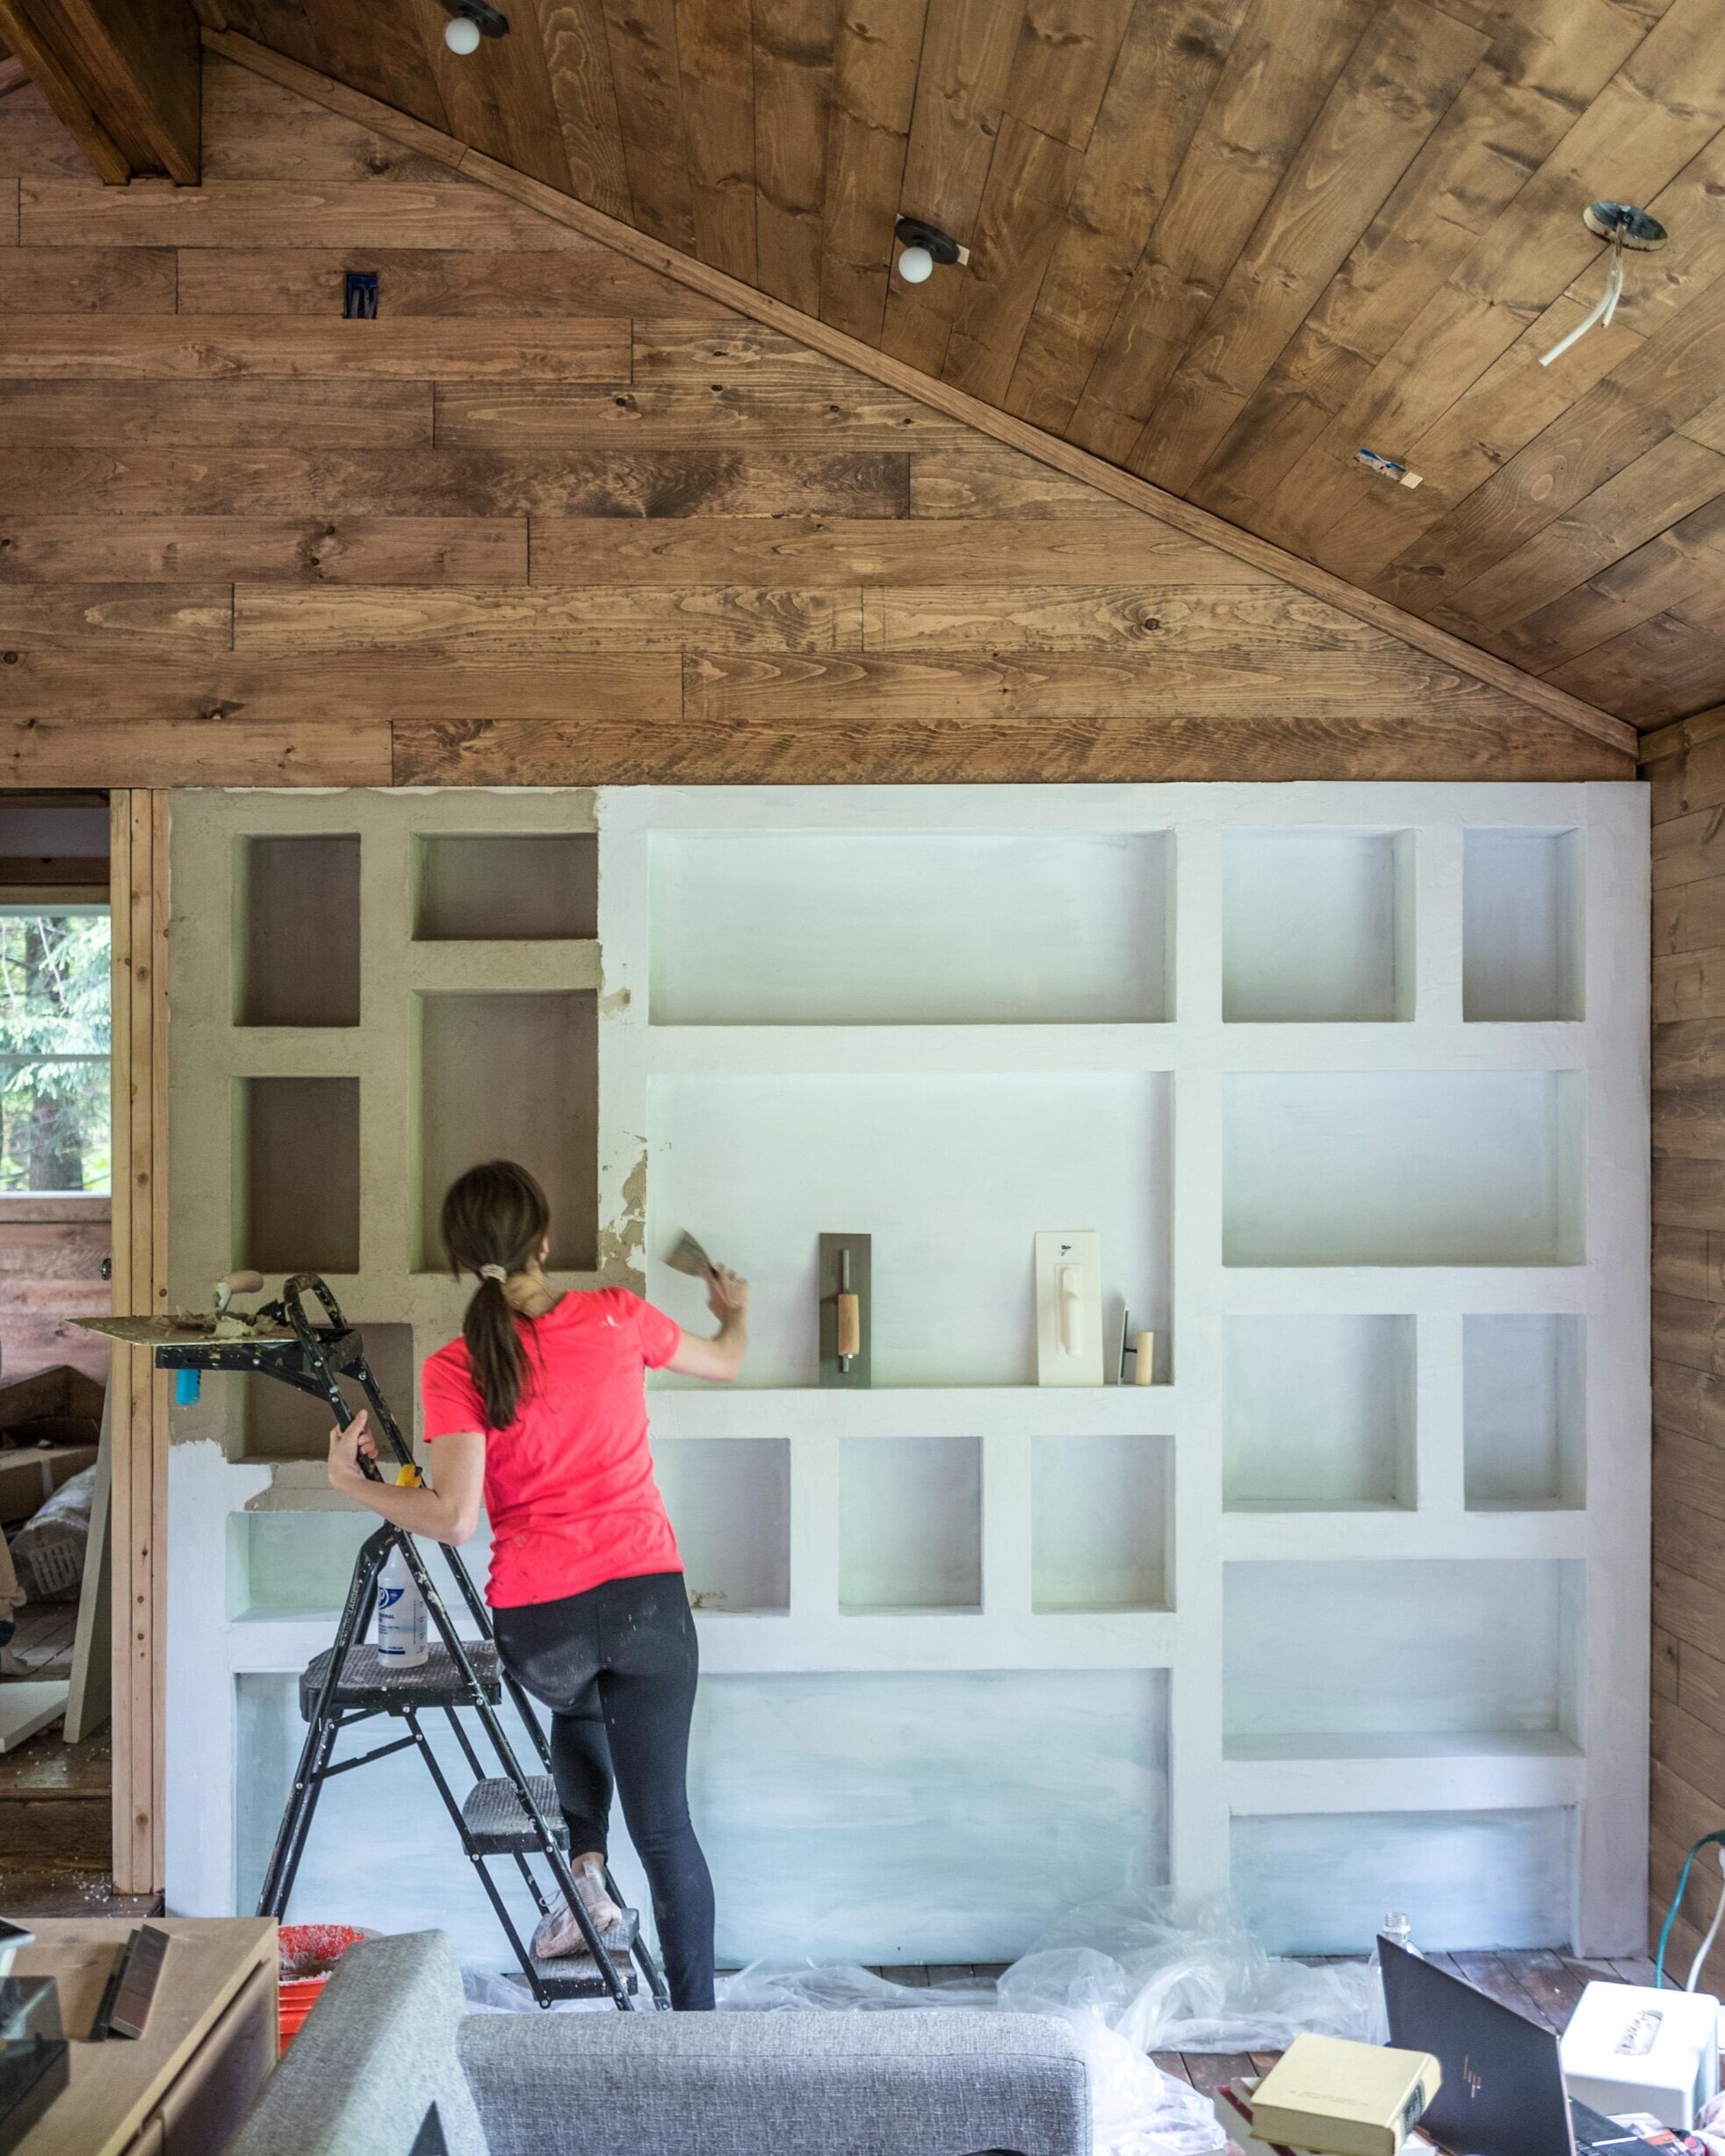
We were debating on using something like metal lath to cover our wooden frame but decided on a much easier and secure ¼ inch drywall. This was tedious given our particular project, a built in bookcase with a ton of compartments, but necessary. I patched the larger seams and formed the corners/edges with mesh fibatape and some joint compound.
You can use mesh or paper drywall tape. If using paper tape, American Clay warns to make sure there are no air pockets underneath as this can also lead to delamination. I’ve always had issues with this happening so I tend to prefer the mesh. If you leave gaps in any drywall seams it is possible the plaster may crack in these areas when it dries as well. Make sure your surfaces are secured well with no movement as this can also lead to...you guessed it, cracking.


The joint compound should be scraped wherever it is uneven and not sanded. The company had very specific guidelines for the levels of joint compound that are acceptable. I used a metal scraper to get mine as even as possible and within their 1/16 of an inch requirement.
Any dust must be vacuumed or wiped clean with a cloth.
Setting joint compound, aka hot mud, is recommended. If you mess this step up like I did and use an all purpose pre-mixed (light weight) joint compound you need to add an additional step and use a sealing primer. I used Rx35 to seal everything and finally we were ready to prime.
PRIME
I purchased an American Clay Primer sand additive and mixed it into one of their approved primers, Kilz. The sand additive gives a slightly rough texture to give your plaster something to grip on to, and again, not just crack and fall off the wall.
I mixed 1lb of the sand additive into 1 gallon of my primer and mixed it well with a paint stirrer. You should mix it again occasionally as you work since the sand can settle to the bottom. I used a 6 inch smooth/short nap roller to roll it on as evenly as possible and then it was time for the real show to begin-plaster!


1ST/BASE COAT
What I Used
Once my primer fully dried I could start my base coat. It was recommended that I start with Loma in Snow Canyon for my base since I wanted a natural/bone white as the finished color for our project and also desired a matte appearance. One 50 lb bag of Loma should cover about 180 sq ft per coat.
Mix It and Rest It
To mix the plaster we used a large 5 gal bucket and a mixer attachment on our drill, adding a little plaster and water at a time to mix evenly. The plaster should be a soft-serve ice cream consistency and we ended up using about 2 gallons of water for the one bag to achieve this.
Ways you can mess this up: If you make it too thick (which would take a lot more effort to apply), or thin (it could just slide down the wall).
Then you have to let it rest. It should sit for at least an hour before applying but apparently the longer it sits, the better it is. Like, they can be mixed up to a month prior. Whoa!
Application
For the Loma plaster, American Clay recommends applying it as thin as one credit card. Any thicker or thinner and again...there is possible delamination or cracking in your future.
I used a scoop to scoop out some of my product onto my hawk to “prime” it, aka spread a little on my metal tray so when I scooped more plaster on, it would hold better. Then, I used a metal trowel I found on Amazon to take some plaster and finally get it on the wall. I’m pretty used to projects where similar skills are used but I still found the workshop video helpful.


Basically you just want to get it evenly on the wall and make sure there are no areas too thick or thin. One super helpful tip for the corners of the wall is to start about an inch away from the corner, spread towards the center, then go back into the corner. This will prevent excess product build up in these areas.
Any trowel edges should be smoothed out to give yourself the best, most even, base possible.
Then it’s time to let it dry. The plaster turns a much lighter color when it has dried. Ours took about 14 hours.
*There is another type of plaster, called Enjarre, that they sell that apparently only requires one coat but we didn’t have a chance to try it.
FINISH COAT
What I Used
For my final coat I used Lomalina in Snow Canyon and mixed in the Sugarloaf White pigment. (This 50 lb bag covers about 200 sq ft per coat.)
*When mixing any plaster with pigment, American Clay warns you could get starring if not mixed properly. This occurs when little parts of the pigment don’t break up and cause streaking when troweled onto the wall.
Application
You start by slightly wetting the base surface with a spray bottle. Don’t saturate the wall or over wet, you just want to lightly mist. The wall should be splotchy and uneven, not dark and uniform from the water -this indicates over wet areas. Misting the surface before starting the finish coat helps give you more time to apply it since it will slow the drying speed.
Here is where it’s super important to get the coat applied evenly and fix any areas on the base coat that were not. Trowel it on just like the first coat but even thinner. Lomalina should be applied slightly thinner than one credit card. On the outer edges of the niches I wrapped a small piece of plastic around the corner and slowly moved it downwards to create a smooth edge.
*I used a plastic trowel for this step which was recommended for the Sugarloaf White color. A stainless steel trowel could have created a grey finish from metal burn marks, thus ruining all my work to this point. Ahh!
FIXING TEXTURE ISSUES
While the plaster is still wet, if there are any uneven surfaces you can rub a very slightly damp tile sponge in circular motions to remove trowel marks or uneven edges. If you have any cracks you can go over it with the trowel when it is still damp but not tacky to the touch.
COMPRESSION
This is the final step! The finish coat needs to be completely dry then you can do one of two compression techniques - sponge compression or hard trowel compression.

Before compression

After compression
Sponge Compression
Use a very very slightly damp tile sponge in circular motions to evenly rub the surface. If the sponge gets too dry and starts collecting pigment you should re-dip it in your bucket. Doing the entire surface of your project with this method of compression can create a more matte look which is why we chose it.
*Afterwards, the surface should not be sandy or dusty. If it is dusty, you can use a damp microfiber cloth in circular motions to clean it off.
SAVING EXCESS
It is recommended to save any plaster you don’t use for touch ups in the future to ensure the color matches. I spread my remaining plaster thinly onto some cardboard and let it fully dry. I was then able to break it up and put it into a plastic bag for future use if needed.

TOOLS
- ¼ inch thick drywall/gypsum board
- drywall screws
- drop cloths or plastic sheets to cover floors
- fibatape mesh drywall tape
- joint compound (I used all purpose but I’d recommend setting compound instead)
- Roman Pro 999 Rx35 drywall repair and sealing primer (you can skip this one if you use the proper setting compound)
- an approved primer, I used Kilz
- American Clay Primer Sand Additive
- short nap paint rollers for priming steps
- short nap to regain energy
- 5 or 7 gallon buckets
- mixing paddle on our handheld mixer
- plaster hawk
- plaster trowels, I used a stainless steel trowel and a plastic trowel for the finish coat
- a few tile sponges
- a few microfiber cloths